Can I Color Polished Concrete?
Adding some concrete color is possible with professional help. Here’s how it works and what you should consider.
Key Takeaways:
- It’s possible to color your polished concrete floor
- The process involves using dye before sealing the concrete
- It’s a five-step process to achieve optimal results
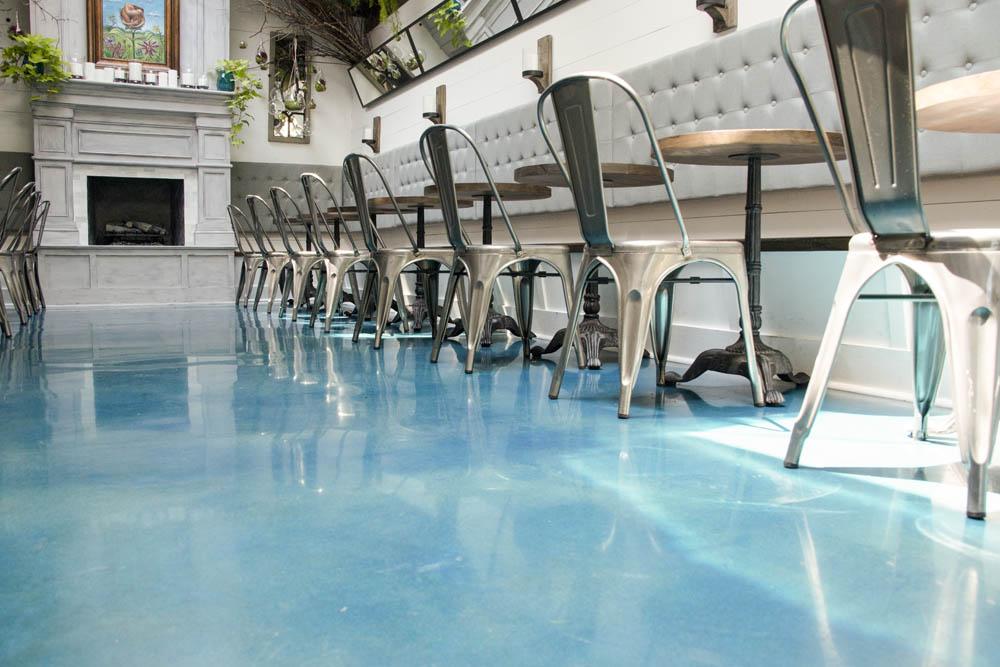
Once upon a time, the words “concrete” and “color” weren’t connected in many people’s minds. It’s a different story today! The market for floors with flair is increasing yearly (set to be worth over $22 billion by 2026!) as property owners realize the creative possibilities.
One of the most striking ways to use color is by combining it with polished concrete. Not only do you get a visually vibrant floor, but it will also have a degree of shine ranging from matte to super-reflective. Here’s an explanation of the five-step process from first prep to final polish!
Step 1 – Cleaning the surface
Concrete can get stained, moldy, or even salty over time, creating the kinds of greens, yellows, blacks, and whites you don’t want on your floor. These must be washed away or, in some cases, seared off with a light acidic solution before anything else can be done.
Concrete dust or other small-scale debris must also be removed. Unresolved stains will show through coloring agents and polish to interfere with the final effect, so let the pros remove them as effectively as possible.
Step 2 – Preparing the surface
This is where the surface layer of concrete is removed by grinding it away using diamond-coated pads. Contractors slowly pass over the surface a set number of times depending on the level of grit needed for the job.
The higher the grit level, the more diamonds are in the grinding equipment, and the more highly polished the finish will be. Stained, moisture-damaged, or otherwise compromised concrete is thus removed, as are any other obsolete elements like tiles, carpeting, or old paint.
Another cleaning will be necessary once the floor has been prepared to the desired level, as this will eliminate any dust or other unwanted elements generated during grinding. Listen to the diamond tooling episode of our This is Concrete podcast to learn more about grinding from the experts!
Step 3 – Area masking (if necessary)
Concrete color isn’t limited to single or multiple shades. You can also get creative by adding line and shape, integrating glossy geometric designs or curves and swirls. Your contractor will section the floor using a special filament pattern tape, so the desired colors and designs are laid out correctly and won’t be ruined by leftover adhesive when the tape is removed.
Step 4 – Applying the color
Three concrete color methods allow customers to choose from stains, dyes, or pigments that can be sprayed, rolled, or brushed in. Here’s how they differ:
-Stains
Wait, didn’t we want to get rid of stains? Not in this case. Staining uses acids to create chemical reactions within the concrete’s calcium hydroxide that alters its color. Staining typically offers a more limited, earthy color palette.
It’s a unique way to tint a floor, and there’s no telling exactly how the color will turn out. This is due to variables like the concrete’s porosity, blend, and age. These factors also apply to the other coloring methods in this section.
-Dyes
Dyes are colored powders mixed with either water or a solvent. These offer a more varied, vibrant, and predictable result than staining. Single dyes can be blended to order, while multiple shades can be mixed to create new ones.
The less solvent or water you use, the stronger your dyed color will look so that you can experiment with varying degrees of smokiness or transparency. Dyes go down fast and clean up quickly, so this could be the right choice if you’re on a tight decorating schedule. Dyes aren’t as resistant to UV light as stains and will require a topical guard to mitigate fading.
-Pigments
These are another coloring option primarily composed of synthetic iron oxide. Pigments can be dry powders or liquids. Customers can select a base concrete color and use that to create further color options depending on the type of concrete it’s mixed with.
Contractors particularly skilled in concrete color can combine these methods to create any shade and effect you want. Once all the color is applied, and all the grinding and polishing is done, it’s time to add the sealant.
Step 5 – Sealing the color
Concrete sealants are liquids spread across a floor’s surface in multiple coats to lock in color and preserve it against damage. They vary in type, meaning your contractor may use either a urethane or epoxy sealant. Both offer plenty of resistance to water and abrasions, though epoxy is more effective at covering imperfections in the underlying substrate, and urethane is better able to resist scratches and impact marks.
Acrylic sealers are another option, offering the most affordable protection but only in the short term. They’re thinner and will require more maintenance over time, which can offset that initial financial saving. Here’s a good sealant comparison chart to help you decide.
Additionally, our podcast gives you a front seat with concrete coating expert Austin Windham. He talks about epoxy and urethane, the pros and cons of different materials, and the all-important relationship between desired aesthetics and final cost.
A final thought on coloring polished concrete
Aligning the client’s wants and expectations with the realities of the job is vital. This is particularly true with concrete color since what you see on the swatches may not be what finally settles into the surface. There’s always some degree of variability based on site-specific factors.
The best way to get a feel for the finished product is by selecting a small section of the floor and experimenting there. Keep in mind that the sample area isn’t a guarantee of how the wider surface will ultimately look.
Contact us with any colored concrete questions
At This is Concrete, we help professionals and the public understand concrete better. We also do everything but pour the stuff! Visit our contact page to ask any concrete-related questions or discuss your project needs.